How to Make a Sourdough Starter in 10 Days

A sourdough starter is simply flour and water transformed by wild yeast and beneficial bacteria. With a scale, a clean jar and a consistent routine, you can build one at home in about 10 days. Think of day 10 as a checkpoint rather than a deadline: some starters become dependable in 10 days, while others need 14 days or longer.
This low-waste method uses small feedings and clear readiness tests, so you can follow the starter instead of guessing from the calendar.
What You Need
- A clean, straight-sided glass jar with room for the starter to triple
- A digital scale that measures in grams
- A spoon or small silicone spatula
- A loose-fitting lid (do not seal the jar airtight)
- A rubber band or washable marker to record the starting level
- Whole rye or whole-wheat flour
- Unbleached bread flour or all-purpose flour
- Room-temperature water
Keep the jar in a comfortably warm place, ideally around 74–78°F (23–26°C), away from direct sun and strong heat. If your tap water smells strongly of chlorine, use filtered water.
The Simple Feeding Formula
This guide begins with a 1:1:1 feeding by weight: equal weights of retained starter, water and flour. For example, keep 25 grams of starter, then add 25 grams of water and 25 grams of flour.
Discarding before a feeding is not a sign of failure. It keeps the culture at a manageable size and makes sure the available microorganisms receive enough fresh flour and water. Until the starter is mature, compost the discard rather than using it in uncooked recipes.

Day 1: Mix the Starter
Place 30 grams of whole-grain flour and 30 grams of water in the jar. Mix until no dry flour remains. The consistency should resemble a thick batter. Scrape down the sides, mark the level and rest the lid loosely on top.
Whole-grain flour is useful at the beginning because it brings more of the grain into the culture. Do not worry if nothing visible happens today.
Day 2: Observe Before You Feed
Look for a change in aroma, a few bubbles or a slight rise. Keep 30 grams of the mixture and discard the rest. Add 30 grams water and 30 grams whole-grain flour, mix thoroughly and mark the new level.
If your room is cool, the jar may appear completely quiet. Continue on schedule; extra heat can damage the culture, while patience costs nothing.

Day 3: Expect a Possible False Rise
Many new starters suddenly expand on day two or three and then become quiet. This early burst is a normal transition in the microbial community, not proof that the starter is ready to leaven bread.
Repeat the feeding: retain 30 grams starter and mix in 30 grams water plus 30 grams flour. You may now use a blend of 15 grams whole-grain flour and 15 grams unbleached bread or all-purpose flour.

Day 4: Stay Consistent Through the Quiet Phase
The starter may smell sharp, cheesy or unusual and may show less activity than yesterday. Keep the routine steady. Retain 30 grams, then feed 30 grams water and 30 grams of the half whole-grain, half white-flour blend.
A clean, sour or fermented aroma is expected. If you see fuzzy mold or pink, orange or red discoloration, discard the entire starter, clean the equipment thoroughly and begin again.
Day 5: Watch the Rise, Not Just the Bubbles
Continue the same once-daily feeding. After mixing, use the rubber band to mark the level and note how high the starter rises before it begins to fall. Bubbles show fermentation, but an increase in volume tells you the culture can trap gas.
A thin grayish liquid or an acetone-like smell usually means the starter has exhausted its food. Feed it rather than adding extra flour without measuring.
Day 6: Learn Its Peak
Feed 30 grams starter with 30 grams water and 30 grams flour. Check the jar a few times during the day. At its peak, a healthy starter often has a domed top, abundant bubbles and its highest volume. The top flattens and streaks appear on the jar as it falls.
Record the time between feeding and peak. This is more useful than following someone else’s clock because flour, water and room temperature vary from kitchen to kitchen.

Day 7: Adjust Only If the Starter Is Ready
If the starter is clearly rising and falling within 12 hours, begin feeding twice a day, approximately 12 hours apart. If it is still sluggish, continue once daily. Feeding a weak starter too often can dilute it before the culture has multiplied.
For either schedule, keep the 1:1:1 ratio: 25 grams starter, 25 grams water and 25 grams flour. Using 25 grams now reduces waste without changing the ratio.

Day 8: Build Strength
Continue the schedule the starter earned on day seven. A culture that is consuming a 1:1:1 feeding in only four to six hours may benefit from more food. In that case, try a 1:2:2 feeding: 20 grams starter, 40 grams water and 40 grams flour.
Do not change the flour, ratio, temperature and feeding frequency all at once. One deliberate adjustment makes it easier to understand the result.
Day 9: Test Repeatability
Feed the starter and time its rise. You are looking for a repeatable pattern, not one impressive performance. A starter approaching maturity should at least double after feeding, hold that rise briefly and then fall in a similar window from one cycle to the next.
The aroma should be pleasantly fermented—often fruity, yogurty, wheaty or mildly acidic—rather than rotten or putrid.
Day 10: Decide Whether It Is Ready
Your starter is ready for a first loaf when it meets all of these practical tests:
- It doubles or more after a feeding within roughly 4–8 hours in a comfortably warm room.
- It repeats that performance for at least two or three consecutive feedings.
- It has bubbles throughout the jar, not only on the surface.
- It reaches a visible peak and then gradually falls.
- It smells clean, fermented and pleasantly acidic.
If it does not pass yet, nothing has gone wrong. Continue the day 8–9 routine for several more days. A calendar cannot see the temperature of your kitchen or the microbial population of your flour.
Do You Need the Float Test?
No. A spoonful of starter that floats has trapped gas, but the result can change with hydration, flour choice and how carefully the sample is handled. Predictable rising after several feedings is a more useful readiness test.
Common Starter Problems and Fixes
- It rose dramatically, then stopped: This is the common early transition. Continue consistent feedings.
- It smells like nail-polish remover: It is probably hungry. Feed it at peak or soon after it begins to fall.
- It is barely moving: Confirm the room is warm enough, use some fresh whole-grain flour and allow more time between feedings.
- It is runny: Warm temperatures and fermentation can loosen the mixture. Weigh every ingredient rather than measuring by volume.
- There is liquid on top: This often means the culture needs feeding. Pour it off or stir it in, then feed normally.
- There is fuzzy mold or pink, orange or red color: Discard everything and restart. Do not try to scrape off the affected area.
How to Maintain Your Starter
If you bake several times each week, keep the starter at room temperature and feed it at least daily, adjusting the ratio so it does not run out of food before the next feeding. If you bake occasionally, let a feeding begin to rise, refrigerate the jar and refresh it about once a week.

Before baking with a refrigerated starter, bring a small portion to room temperature and give it one or more feedings until it again rises predictably. Always keep a little culture back so your entire starter does not disappear into the dough.
Where a Spiral Mixer Fits
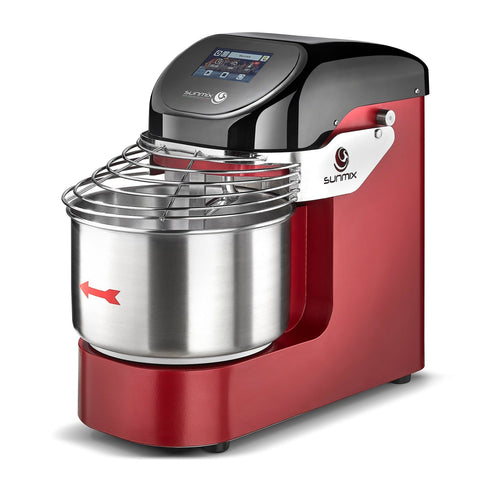
You do not need a mixer to create the starter itself—a spoon is the right tool for this small culture. The mixer becomes useful after the starter is mature, when you combine flour, water, salt and levain into bread dough. A spiral mixer can develop dough efficiently while giving the baker better control over mixing time and finished dough temperature, especially for repeated loaves or higher-hydration doughs.
Ready to move from starter to dough? Explore the Sunmix EVO6 spiral mixer for home and small-batch bread production.
A Final Note for Day 10
A strong starter is built by observation, not by forcing a deadline. Feed by weight, keep one variable at a time, mark every rise and let consistent performance tell you when it is ready. The reward is a culture you can maintain for years—and a reliable foundation for naturally leavened bread.
Method reviewed against established sourdough feeding guidance from King Arthur Baking and the day-by-day educational approach used by The Sourdough Journey. This article is original CulinaryProfis editorial content.