
Upgrade Your Home Kitchen to Restaurant Quality in 2026

Upgrading your home kitchen to restaurant quality means combining pro-style residential appliances, efficient workflow design, and proper utility infrastructure to create a space that performs like a professional kitchen. The industry term for this approach is “pro-style residential kitchen,” a category distinct from true commercial equipment and specifically engineered for home environments. The gap between a standard home kitchen and a restaurant-grade setup comes down to three factors: equipment output, layout efficiency, and utility capacity. Get all three right, and you cook faster, cleaner, and with far better results.
What appliances should you choose to upgrade your home kitchen to restaurant quality?
Commercial-grade equipment is often unsuitable for home environments due to excessive heat emission, noise levels, and installation complexity. Pro-style residential appliances solve this problem. They deliver high output while meeting residential building codes and fitting standard home dimensions.
The appliances that make the biggest difference are:
- High-BTU gas range: Look for ranges producing 15,000–25,000 BTU per burner. This output lets you sear proteins, reduce sauces fast, and maintain rolling boils without waiting.
- Dual-fuel cooktop: Gas burners for high heat, electric oven for precise baking temperatures. Serious home cooks treat this combination as the standard.
- High-CFM range hood: Experts recommend a minimum 900 CFM for high-output home ranges. Anything less and grease, smoke, and heat accumulate in the kitchen.
- Counter-depth refrigerator with chef-drawer access: Keeps cold storage at arm’s reach during prep without blocking traffic flow.
- Undercounter refrigeration: A dedicated drawer unit for proteins and dairy at the prep station eliminates trips across the kitchen during service.
Pro Tip: Before purchasing any appliance, verify your gas supply line BTU capacity and electrical panel amperage. Buying a 48-inch dual-fuel range and then discovering your panel cannot support it costs time and money to fix.
Noise and heat output matter more than most home cooks expect. A true commercial convection oven generates heat loads that residential HVAC systems cannot handle. Pro-style models are calibrated for home environments, which is why they are the correct choice for selecting professional-grade appliances for residential use.
Pairing the right appliances with professional kitchen essentials like quality knives and prep tools compounds the performance gain. A sharp, well-balanced knife from a trusted source, combined with proper knife handling techniques, reduces prep time and improves safety at the cutting station.
How do you optimize kitchen layout for restaurant-quality cooking at home?
The kitchen work triangle links the refrigerator, sink, and stove in a triangular path that minimizes unnecessary movement. Professional kitchens adapt this concept into dedicated stations. Home kitchens benefit from the same logic.
A practical station-based layout for home cooks follows this sequence:
- Prep station: Position your cutting board, knife block, and mixing bowls adjacent to the refrigerator. This keeps cold ingredients close and reduces cross-kitchen travel.
- Cooking station: Place your range and hood at the center of the workflow. Pots, pans, and cooking oils belong within arm’s reach on open shelving or a pot rail.
- Plating station: Designate a clear counter space near the range for plating. Keep plates, garnishes, and serving tools here. Restaurants call this the pass; home kitchens benefit from the same discipline.
- Cleaning station: The sink and dishwasher anchor the cleaning zone. Keep it separate from prep to avoid contamination and traffic conflicts.
Pro Tip: Pull-out shelving inside base cabinets eliminates the need to crouch and dig for equipment. Install full-extension drawer slides rated for at least 100 pounds. This single change improves speed and reduces fatigue during long cooking sessions.
Effective kitchen design balances professional equipment with ergonomic station layouts, ensuring the kitchen supports serious cooking without overwhelming the home environment. Cabinet reconfiguration and open shelving are low-cost changes that deliver immediate workflow gains. For a deeper look at flow principles, the guide on open kitchen design covers station zoning in detail.

What infrastructure upgrades does a professional-grade home kitchen require?
Infrastructure is where most home kitchen upgrades stall. Equipment choices are visible and exciting. Electrical panels, gas lines, and ventilation ducting are not. Skipping this step causes expensive rework and safety hazards.
| Utility | Standard Home Capacity | Pro-Style Kitchen Requirement | Estimated Upgrade Cost |
|---|---|---|---|
| Electrical | 200A single-phase | 200A+ with dedicated circuits | $5,000–$50,000 |
| Gas supply | ¾" line, variable BTU | Sized per NFPA 54 BTU load | $1,500–$8,000 |
| Ventilation | Standard bath fan | 900+ CFM ducted hood | $2,000–$10,000 |
| Permitting | N/A | 4–8 weeks, $2,000–$15,000 | Varies by jurisdiction |
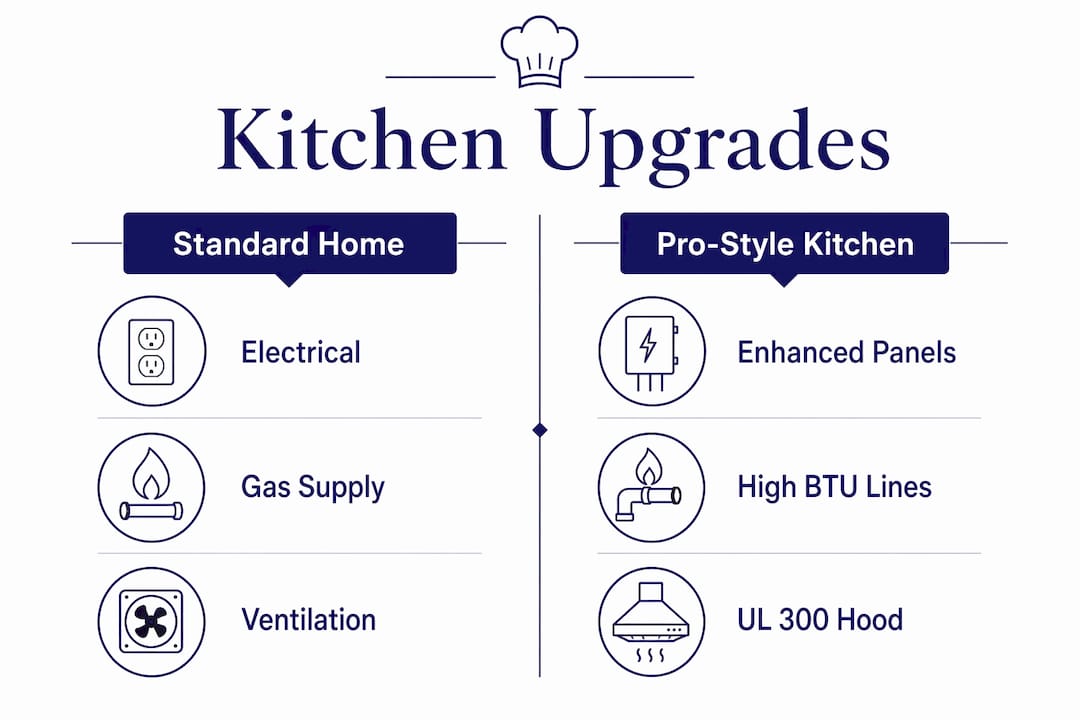
Typical residential electrical service runs at 200A single-phase, which is often insufficient for multiple high-draw appliances running simultaneously. A 48-inch dual-fuel range, undercounter refrigeration, and a high-CFM hood running at the same time can exceed that capacity. Utility-side upgrades to support this load range from $5,000 to $50,000 depending on complexity.
Gas line sizing follows NFPA 54-compliant calculations based on BTU load, line length, and pressure drop. A common mistake is assuming an existing 1-inch line is adequate. It often is not, and an undersized line creates unsafe pressure conditions at the burner.
“Load calculations are critical to avoid costly mistakes such as undersized gas lines or inadequate electrical panels. Skipping this step causes expensive rework and creates real safety hazards that inspectors will flag during permitting.” — Industry guidance on utility infrastructure for high-performance kitchens
Homeowners frequently skip early collaboration with MEP engineers, leading to schedule delays and budget overruns. Engage a licensed mechanical, electrical, and plumbing engineer before finalizing any appliance purchase. Permitting for kitchen build-outs typically takes 4–8 weeks with fees between $2,000 and $15,000. Factor this into your project timeline from day one.
True commercial equipment in homes often requires Type I hood systems with UL 300 fire suppression and ducting to the roof. Many residential permits deny these installations outright. This is the clearest reason to choose pro-style residential models over true commercial units.
What materials and finishes replicate a professional kitchen environment?
Surface selection separates a kitchen that looks professional from one that performs professionally. The right materials handle heat, moisture, and daily abuse without degrading.
Countertop options compared:
| Material | Heat Resistance | Ease of Cleaning | Maintenance Level | Best Use |
|---|---|---|---|---|
| Stainless steel | Excellent | Excellent | Low | Prep and cooking zones |
| Quartz | Good | Very good | Low | General countertops |
| Butcher block | Poor (near heat) | Moderate | High | Dedicated prep station |
Stainless steel countertops offer heat resistance and cleaning ease, making them the standard in professional kitchens. Quartz provides a balance of durability and aesthetics for areas away from direct heat. Butcher block works well as a dedicated prep surface but requires regular oiling and is not suitable near the range.
For cabinetry, frameless construction with moisture-resistant plywood boxes outperforms particleboard in high-humidity cooking environments. Avoid MDF door panels near steam-heavy cooking zones. They warp.
Additional material considerations:
- Flooring: Porcelain tile or sealed concrete handles spills, heat, and heavy foot traffic. Both clean quickly and resist staining.
- Backsplash: Full-height stainless steel or large-format porcelain tile behind the range eliminates grout lines that trap grease.
- Open shelving: Stainless steel wire or solid shelving keeps tools visible and accessible, exactly as in a restaurant prep kitchen.
Balancing aesthetics with function is straightforward: choose materials that clean in under 30 seconds and do not require special products. Anything more demanding than that will not hold up under serious cooking use.
Key Takeaways
Upgrading a home kitchen to restaurant quality requires pro-style appliances, station-based workflow design, and verified utility infrastructure before any equipment purchase.
| Point | Details |
|---|---|
| Choose pro-style, not commercial | Pro-style residential appliances deliver high output while meeting home building codes and fitting standard dimensions. |
| Verify utilities first | Check electrical panel capacity, gas line BTU rating, and ventilation CFM before buying any appliance. |
| Design by station, not by room | Organize prep, cooking, plating, and cleaning into dedicated zones to match professional kitchen workflow. |
| Select durable surfaces | Stainless steel and quartz countertops outperform standard materials in heat resistance and cleaning ease. |
| Budget for permits and engineering | Permitting takes 4–8 weeks and costs $2,000–$15,000; MEP engineering prevents costly rework. |
What I’ve learned from watching home kitchen upgrades go wrong
The most common mistake I see is buying the appliances first and planning the infrastructure second. A home cook orders a 48-inch, 6-burner dual-fuel range, then discovers the gas line cannot support the BTU load and the electrical panel needs a dedicated 240V circuit. The range sits in the garage for six weeks while contractors sort out the utility work. This sequence costs money and kills momentum.
The second mistake is treating kitchen flow as an afterthought. Equipment quality matters, but if your prep station is on the opposite side of the kitchen from your range, you will spend half your cooking time walking back and forth. I have seen beautifully equipped kitchens that function worse than a basic galley layout because no one thought about station placement.
My honest recommendation: start with a budget-aware kitchen plan before touching a single appliance catalog. Map your workflow, measure your utility capacity, and then select equipment that fits both. Incremental upgrades aligned with your actual cooking goals outperform a single large purchase that outpaces your infrastructure.
The cooks who get the best results from a home kitchen upgrade are not the ones who spend the most. They are the ones who understand the relationship between equipment, layout, and utilities before spending anything.
— John
Culinaryprofis: professional equipment for serious home cooks
Home cooks ready to act on these upgrades need a reliable source for pro-style appliances that meet residential requirements without compromising on output.

Culinaryprofis carries a curated selection of commercial-grade kitchen appliances including gas ranges, high-CFM ventilation systems, undercounter refrigeration, and prep tools built for serious cooking. Every product on the platform is selected for durability and performance in demanding kitchen environments. Culinaryprofis also offers expert support to help you match equipment to your kitchen’s utility capacity and layout. Free shipping and a flexible return policy make it straightforward to equip your kitchen with confidence. Call the Culinaryprofis team directly for guidance on appliance selection and installation planning.
FAQ
What does it cost to upgrade a home kitchen to restaurant quality?
Mid-range remodels with high-end residential appliances range from $48,000 to $65,000, while luxury renovations with full pro-style equipment often exceed $130,000. Utility upgrades and permitting add $5,000–$50,000 depending on your home’s existing infrastructure.
What is the difference between commercial and pro-style residential appliances?
Commercial-grade equipment produces excessive heat, noise, and installation complexity that makes it unsuitable for most home environments. Pro-style residential appliances deliver comparable output while meeting residential building codes and fitting standard home dimensions.
How many CFM does a range hood need for a high-output home range?
Experts recommend a minimum of 900 CFM for range hoods paired with high-output home ranges. Lower CFM ratings allow grease, smoke, and heat to accumulate, which creates both air quality and fire safety problems.
Do I need a permit to upgrade my home kitchen with professional appliances?
Yes, most jurisdictions require permits for gas line modifications, electrical panel upgrades, and ventilation ducting changes. Permitting typically takes 4–8 weeks and costs between $2,000 and $15,000, so plan for this timeline before scheduling any installation work.
What countertop material works best in a professional home kitchen?
Stainless steel is the top choice for prep and cooking zones due to its heat resistance and easy cleaning. Quartz works well for general countertop areas where aesthetics matter and direct heat exposure is limited.